
Welcome to the James Hardie Installation Guide, your comprehensive resource for successful siding projects. This guide provides detailed instructions, best practices, and expert tips to ensure a professional finish.
1.1 What the Guide Offers
This guide provides comprehensive instructions for installing James Hardie siding, ensuring a professional and durable finish. It covers substrate preparation, tool requirements, and step-by-step installation processes. The guide also includes tips for specific siding types, such as plank and panel siding, and offers troubleshooting solutions for common issues. By following the detailed recommendations, homeowners and contractors can achieve a flawless installation that enhances both the appearance and longevity of the siding. This resource is essential for anyone aiming to complete a successful James Hardie siding project.
1.2 Key Benefits of Using James Hardie Siding
James Hardie siding offers exceptional durability, fire resistance, and low maintenance, making it a superior choice for exterior cladding. Its fire-resistant properties provide added safety, and the siding is engineered to withstand harsh weather conditions. The paint performance is long-lasting, reducing the need for frequent touch-ups. Compared to wood, it resists pests and warping, ensuring a timeless appearance. These benefits combine to provide homeowners with a reliable and aesthetically pleasing solution for their homes, backed by comprehensive installation guidelines for optimal results.

Preparation for Installation
Preparation is essential for a smooth installation process. Ensure the substrate is in good condition, clear of debris, and properly aligned. Gather all necessary tools and materials beforehand to avoid delays and ensure compliance with manufacturer guidelines.
2.1 Checking Substrate Conditions
Before installing James Hardie siding, inspect the substrate to ensure it is structurally sound. Check for any signs of damage, rot, or deterioration. Ensure the surface is level, plumb, and securely fastened. Existing siding can be used as a substrate if it is in good condition. Verify that all surfaces are clean and free from debris. Address any issues before proceeding to guarantee proper installation and long-term performance of the siding.
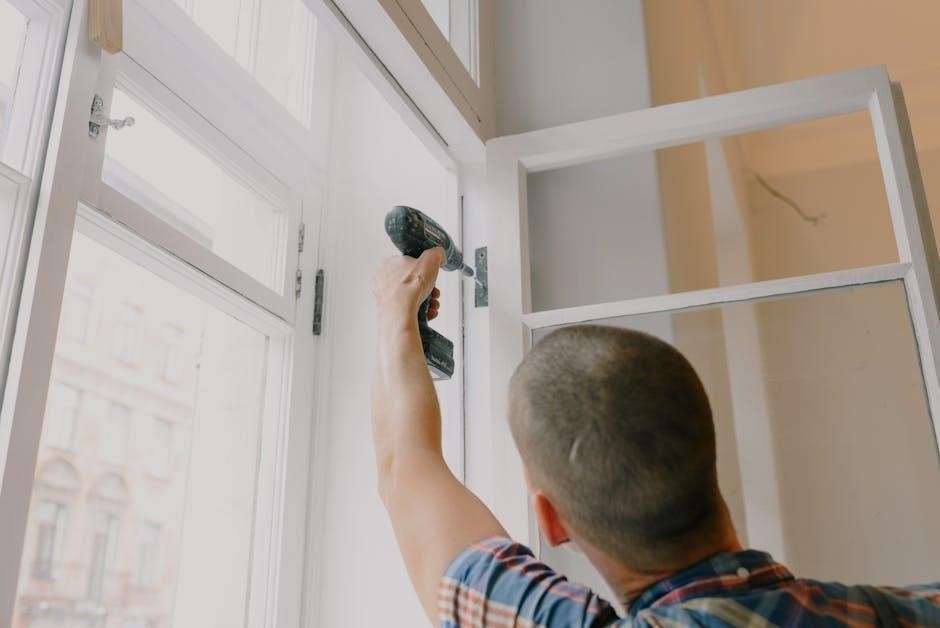
2.2 Tools and Materials Needed
To begin the installation, gather essential tools and materials. These include a utility knife, circular saw, drill, and screwdriver for cutting and fastening. Weather-resistant barriers, flashing, and sealants are necessary for moisture protection. Ensure you have the correct fasteners, such as nails or screws, specifically designed for James Hardie siding. Additionally, obtain starter strips, trim, and any specialized tools recommended by James Hardie. Having all materials ready ensures a smooth and efficient installation process.
Installation Process
The installation process begins with preparing the surface and applying a weather barrier. Install starter strips along the base, ensuring alignment and secure fastening. Proceed with planks or panels, maintaining proper spacing and pattern consistency for a seamless look. Follow specific tips for plank and panel siding to achieve professional results. Regularly inspect and adjust as needed to ensure a durable and visually appealing finish.
3.1 Installing Starter Strips
Installing starter strips is the first step in the siding process. Begin by aligning the starter strip with the bottom edge of the wall, ensuring it is level and secure. Fasten the strip using recommended materials, typically 1-1/4″ galvanized or stainless steel nails, spaced every 6-8 inches. Make sure the strip is snug against the substrate and properly sealed to prevent water intrusion. This step lays the foundation for the rest of the siding installation, ensuring planks or panels align correctly and maintain structural integrity.
3.2 General Installation Tips
For a successful installation, follow these general tips. Always handle siding with care to avoid damage. Ensure the substrate is clean, dry, and even before starting. Use the correct tools, such as a utility knife or siding snips, to cut materials precisely. Maintain proper alignment and spacing between planks or panels to allow for expansion and contraction. Apply a bead of weather-resistant sealant at all joints and seams to prevent water infiltration. Work from the bottom up, ensuring each course is securely fastened before moving to the next. Regularly inspect and address any gaps or misalignments promptly to maintain structural integrity and appearance.
3.3 Specific Tips for Plank Siding
When installing plank siding, ensure proper alignment by starting with a straight, level edge. Use a chalk line to mark courses for accuracy. Maintain a 1/8-inch gap between planks to allow for expansion. Fasten planks securely, avoiding over-tightening, which can cause warping. For curved cuts, use a jigsaw or circular saw with a fine-tooth blade. Always pre-drill holes for nails to prevent splitting. Apply sealant to all cut edges to protect against moisture. Regularly inspect planks for alignment and tighten loose fasteners as needed to maintain a smooth, even appearance.
3.4 Specific Tips for Panel Siding
For panel siding, ensure proper alignment and leveling before securing. Use a rubber mallet to fit joints tightly, avoiding gaps. Apply weather-resistant sealant to all edges and joints. Maintain a 1/4-inch gap between panels to prevent warping. Use a level to ensure panels are straight, especially on large surfaces. Pre-drill holes for fasteners to avoid cracking. Apply sealant to cut edges for moisture protection. Regularly inspect panels for alignment and tighten fasteners as needed to maintain a smooth, even appearance.

Fastening Guidelines
Use galvanized or stainless steel fasteners compatible with James Hardie siding. Ensure fasteners penetrate studs for secure hold. Maintain proper spacing and avoid over-tightening to prevent damage.
4.1 Recommended Fastening Materials
For durable and secure installation, use galvanized or stainless steel fasteners compatible with James Hardie siding. These materials resist corrosion and ensure long-lasting performance. Avoid using nails or screws that may degrade over time. Fasteners should be designed to penetrate studs for maximum hold. Proper spacing and alignment are crucial to prevent warping or buckling. Always follow manufacturer guidelines for specific product compatibility. Using the right fastening materials ensures a sturdy and weather-tight installation, protecting your siding from environmental stressors and maintaining its appearance over the years.
4.2 Proper Fastening Patterns
Proper fastening patterns are essential for a secure and visually appealing installation. For plank siding, fasteners should be spaced 12-16 inches apart, centered on studs. Ensure screws are driven straight and not over-tightened to avoid warping. For panels, follow a staggered pattern to maintain structural integrity. Always align fasteners with the siding’s nailing groove. Maintain a minimum of 1/8 inch gap between planks for expansion. Fasteners should be 1 inch from the edge to prevent cracking. Proper spacing and alignment ensure a durable, weather-tight seal and a professional finish that withstands environmental stressors and maintains its appearance.
Advantages of James Hardie Siding
James Hardie siding offers exceptional durability, fire resistance, and low maintenance. It resists pests, weather, and fading, providing a long-lasting, attractive exterior for your home.
5.1 Fire Resistance
James Hardie siding is highly fire-resistant, making it a safer choice for homeowners. Its cement-based composition resists ignition and withstands extreme temperatures better than wood. This durability ensures enhanced protection against fire damage, providing peace of mind, especially in fire-prone areas. The siding’s non-combustible properties also contribute to meeting local fire safety codes. By choosing James Hardie, you invest in a product that prioritizes both safety and long-term performance for your home’s exterior.
5.2 Paint Performance and Durability
James Hardie siding excels in paint performance and durability, ensuring a lasting, vibrant finish. Unlike wood, it resists warping and cracking, maintaining paint adhesion for years. The siding’s smooth surface and moisture-resistant properties prevent peeling and fading, reducing the need for frequent repainting. This durability not only enhances curb appeal but also lowers maintenance costs. With proper installation and care, James Hardie siding retains its color and integrity, delivering a hassle-free, beautiful exterior for decades. This makes it a superior choice for homeowners seeking long-term value.
Troubleshooting Common Issues
This section addresses frequent installation challenges, offering practical solutions for warping, buckling, and misalignment. Expert advice ensures issues are resolved efficiently, maintaining siding integrity and appearance.
6.1 Addressing Warping or Buckling
Warping or buckling in James Hardie siding can occur due to improper installation or substrate issues. Check for uneven surfaces and ensure proper fastening patterns. Verify substrate conditions are stable and meet manufacturer guidelines. If warping occurs, inspect for loose or over-tightened fasteners and adjust as needed. Regular maintenance, such as inspecting for gaps or misalignment, can prevent further issues. Refer to the installation guide for specific corrective measures to restore siding integrity and appearance. Addressing these issues promptly ensures long-term durability and performance of your James Hardie siding.
6.2 Fixing Gaps or Misalignment
Gaps or misalignment in James Hardie siding can compromise its appearance and performance. Inspect the siding for improper fastening or uneven substrate surfaces. Tighten loose fasteners and adjust misaligned planks or panels. Ensure proper spacing between siding elements to allow for expansion and contraction. If gaps persist, check for substrate irregularities and correct them before reattaching the siding. Regular inspections and adjustments can prevent further misalignment issues, ensuring a seamless and durable exterior finish. Follow the installation guide for precise alignment and gap management techniques.

Maintenance and Care
Regular inspections and cleaning are essential for maintaining James Hardie siding. Check for damage, dirt, or mildew. Use recommended cleaners to preserve the finish. This ensures long-term beauty and protection.
7.1 Regular Cleaning Tips
For optimal maintenance, clean James Hardie siding regularly. Use a soft-bristle brush or garden hose to remove dirt and debris. Avoid harsh chemicals or abrasive cleaners, as they can damage the finish. Instead, mix a solution of mild soap and water, applying it with a soft cloth or sponge. Rinse thoroughly to prevent soap residue. Clean from the bottom up to avoid streaks. Regular cleaning helps preserve the siding’s appearance and durability, ensuring it remains in excellent condition for years to come. Additionally, avoid using pressure washes, as they can damage the siding material.
7.2 Inspecting for Damage
Regular inspections are crucial to maintain the integrity of your James Hardie siding. Check for cracks, water stains, or warping, especially after extreme weather. Look for gaps or misalignment that may have developed over time. Inspect areas around fasteners for signs of wear or loosening. Addressing these issues promptly prevents further damage and ensures long-lasting performance. If you notice significant damage, consult a professional for repairs to avoid compromising the siding’s durability and appearance.
Completing your project with the James Hardie Installation Guide ensures durability and a professional finish. Follow the guide carefully to achieve long-lasting, beautiful results for your home.
8.1 Importance of Following the Guide
Adhering to the James Hardie Installation Guide is crucial for achieving professional results and ensuring the longevity of your siding. Proper techniques prevent costly mistakes and warranty issues. By following the guide, you ensure your siding is installed safely, durably, and aesthetically pleasing. This adherence also guarantees compliance with manufacturer standards, maximizing the product’s performance and appearance over time.
Neglecting the guide can lead to premature wear, structural issues, or even voiding the product warranty. Therefore, careful compliance is essential for a successful and long-lasting installation.
8.2 Final Thoughts on Successful Installation
Completing your James Hardie siding installation is a rewarding achievement, knowing your home is now protected and enhanced. By following the guide, you’ve ensured a professional-grade finish that boosts curb appeal and durability. Proper installation not only enhances aesthetics but also guarantees long-term performance against the elements. Take pride in your work, knowing you’ve invested in a high-quality, lasting solution for your home’s exterior. Remember, attention to detail and adherence to the guide are key to enjoying years of satisfaction with your James Hardie siding.